 Birch Bay Window
 Building New in Cherry Point Means Building for the Weather From Day One
Cherry Point sits right up against the marine air coming off the Strait of Georgia, which means any new home going up here is going to spend its whole life dealing with salt-laden wind, sideways rain, and long stretches of gray, damp weather that never quite dries out. That's a different design problem than building a house in a drier part of Whatcom County. When windows go into a new-construction opening here, the flashing, the sealants, and the window units themselves all need to be selected and installed with that exposure in mind from the very first day — not retrofitted later once problems show up.
New construction gives you one real advantage over a remodel: you get to do the window opening right the first time, with no old materials, no hidden rot, and no guessing about what's behind the wall. That's a big deal in a climate like this one, where moss, algae, and slow-draining moisture are a constant background threat to anything that isn't detailed correctly. The tradeoff is that new construction only pays off if the rough opening, the water-resistive barrier, and the window itself are all coordinated as one system — which is where a lot of otherwise-good builds go wrong.
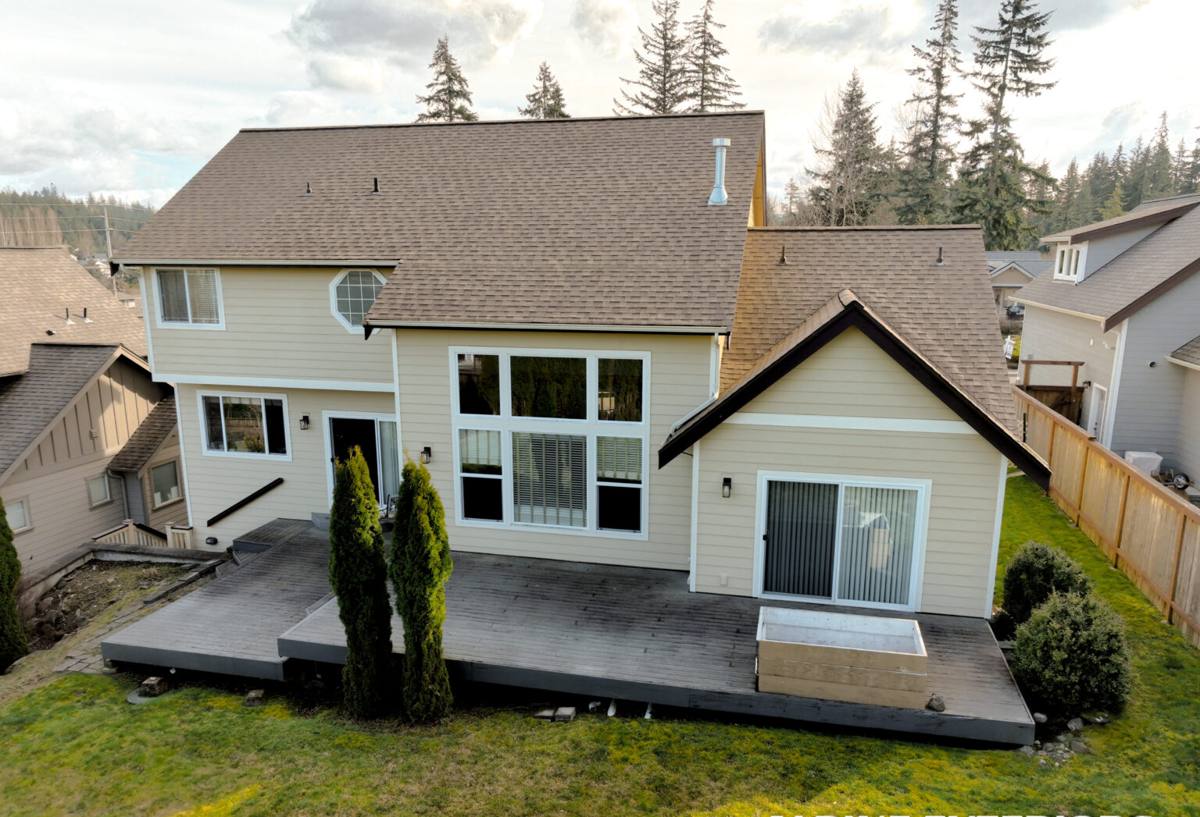
What "New-Construction Windows" Actually Means
New-construction windows are different from replacement windows, and the distinction matters more than most homeowners realize. A new-construction window has a nailing fin (sometimes called a flange) around its perimeter that gets fastened to the framing and then integrated into the wall's weather-resistive barrier before siding goes on. A replacement window, by contrast, is built to fit inside an existing frame without disturbing the exterior wall covering.
Because the wall is open during new construction, this is the only point in a building's life when the window-to-wall connection can be built as a complete, layered water-management system rather than patched together around existing materials. Get it right now, and you're set for decades. Get it wrong now, and you're often looking at a full siding-and-trim removal to fix it later — a much bigger job than it would have been the first time.
Where New Construction Fits on a Cherry Point Build
Most of the new-construction window work we do falls into one of these categories:
- Ground-up new homes, where we're installing windows directly into fresh framing
- Additions and bump-outs on existing houses, where the new section needs to be detailed as its own weathertight assembly
- Garage, shop, or accessory dwelling unit (ADU) builds that still face the same wind and rain exposure as the main house
- Major renovations that have been opened down to the studs, which lets us treat the opening like new construction even though the house itself isn't new
Why Standard Details Aren't Always Enough Here
A lot of window flashing details are written for a generic climate — they assume moderate wind-driven rain and don't account for the kind of sustained, salt-carrying moisture that a shoreline-adjacent property like this deals with year-round. In Cherry Point, wind off the water can drive rain sideways into a wall for hours at a stretch, and the salt content in that air accelerates corrosion on fasteners, flashing, and hardware that would hold up fine twenty miles inland.
On top of that, the long moss season here — realistically most of the fall through spring — means anything that traps moisture against the building envelope becomes a growth surface. Sill pans and flashing details that don't actively drain water back out of the wall assembly are an invitation for exactly that kind of slow, hidden problem. None of this means the job is exotic or requires unusual products; it means every layer of the standard flashing sequence needs to actually be done correctly and in the right order, because there's less room for a shortcut to go unnoticed.
Choosing the Right Window Products for a Cherry Point Build
We don't push one brand as the only option, because the right product depends on the home's design, budget, and exposure. What we do insist on is corrosion-resistant hardware, a frame material that won't degrade in salt air, and glass packages suited to a marine climate rather than a generic inland spec.
Frame Material Trade-Offs
| Frame Material | How It Handles This Climate | Maintenance Burden |
|---|---|---|
| Vinyl | Good moisture and salt resistance; won't corrode or rot | Low — occasional cleaning |
| Fiberglass | Very stable in temperature swings and driving rain; strong long-term performer near the coast | Low |
| Wood-clad | Handsome interior wood look, but exposed wood or damaged cladding is vulnerable in a wet, salty climate | Higher — cladding and seals need regular inspection |
| Aluminum | Strong and slim-profiled, but standard aluminum conducts cold and is more prone to condensation without thermal breaks | Moderate — hardware and finish need monitoring |
We're upfront when a product isn't a good match for this exposure. That's not a knock on any manufacturer — it's just honesty about maintenance burden and moisture behavior. A window that performs beautifully in a dry inland climate can still be the wrong choice a few miles from open water, and we'd rather tell a homeowner that before the order goes in than after.
Glass and Hardware Details That Matter Here
- Low-E glass coatings appropriate for the Pacific Northwest's cloud cover and heating-season needs, not a desert-climate spec
- Dual- or triple-pane units with warm-edge spacers, which resist condensation better in our damp, temperature-swinging weather
- Stainless or otherwise corrosion-resistant fasteners and hardware, since standard-grade steel corrodes faster in salt air
- Weatherstripping and sweep quality that holds up to repeated wind-driven rain events, not just occasional showers
The Installation Details That Separate a Correct Job From a Callback
The window unit itself is often the least likely part of the assembly to fail. What actually causes leaks and rot almost always comes down to the installation sequence around it. On a new-construction opening, that sequence looks like this:
- Rough opening prep — squaring, leveling, and confirming dimensions before the window ever shows up on site
- Sill pan flashing — a sloped, sealed pan at the bottom of the opening that catches any water that gets past the window and directs it back outside instead of into the framing
- Window-to-opening integration — fastening the nailing fin and sealing it to the water-resistive barrier in the correct shingle-style overlap, so water sheds down and out at every layer
- Head flashing — a top flashing detail that diverts water around the window rather than letting it pond above the frame, which matters more here given how often driving rain hits from an angle
- Interior and exterior sealant — appropriate sealants at the right joints, without over-sealing in a way that traps moisture instead of letting the assembly drain and dry
- Insulation and air-sealing around the frame — gaps packed correctly so the window isn't a thermal and air-leak weak point in the finished wall
Skipping or rushing any one of these steps is usually invisible on install day and only shows up as a stain, a soft spot, or a moss patch a year or two later — by which point it's a repair job instead of a five-minute correction.
Our New-Construction Window Process
On a typical Cherry Point new-construction project, our process runs in four stages:
1. Plan Review and Product Selection
We review the architectural plans or existing framing, talk through frame material and glass package options for the home's exposure and budget, and confirm rough opening sizes before anything is ordered.
2. Coordination With the Build Schedule
Window install timing matters. We coordinate with the builder or general contractor so windows go in at the right point in the framing-to-siding sequence — installed too early or too late relative to the weather barrier, and the flashing sequence gets compromised.
3. Installation
Our crew follows the flashing and sealing sequence above on every opening, checking level, plumb, and square as we go, and confirming proper drainage at the sill before moving to the next window.
4. Final Walkthrough
Before we call the job done, we walk the openings with the homeowner or builder, check operation on every unit, and confirm the exterior detailing is ready for siding and trim to close in around it.
What Affects Cost on a New-Construction Window Job
| Factor | Why It Moves the Price |
|---|---|
| Number and size of openings | More and larger windows mean more material, more flashing, more labor hours |
| Frame material chosen | Vinyl generally costs less upfront than fiberglass or wood-clad options |
| Glass package | Triple-pane and specialty coatings cost more than standard dual-pane |
| Wall complexity | Custom shapes, tall openings, or unusual framing take more time to detail correctly |
| Site access and scheduling | Coordinating around other trades on an active build site can affect labor efficiency |
We don't publish a flat price list because every build is different, but most homeowners find that investing a bit more in the right frame material and a correct flashing job up front costs far less than repairing water damage or replacing a poorly detailed window down the road.
A Practical Checklist Before Your Windows Go In
- Confirm rough opening sizes match the ordered window dimensions before delivery
- Verify the water-resistive barrier is installed and ready to integrate with the window flanges
- Ask your installer to walk you through the specific sill pan and flashing detail they'll use
- Confirm hardware and fasteners are rated for coastal or salt-air exposure
- Schedule window installation at the correct point in the framing-to-siding timeline, not rushed to keep a broader schedule on track
- Get a final walkthrough and written confirmation of what was installed and how it was flashed
Why a Crew That Already Works Cherry Point Matters
Window installation isn't exotic work, but window installation done correctly for a specific climate takes local judgment. A crew that mostly works drier, calmer parts of the state can install a technically fine window using details that simply aren't built for sustained wind-driven rain and salt air. A crew that regularly works properties along this stretch of Whatcom County has already seen what happens when a flashing detail is a little too generic for the conditions here — and adjusts before it becomes a problem, not after.
That local experience also shows up in smaller, practical ways: knowing which frame materials hold up best against the salt air over time, understanding how local moss and moisture patterns affect long-term drainage design, and being realistic with builders and homeowners about what maintenance a given product will actually require in this environment.
Ready to Talk Through Your Project?
Whether you're framing a new home, building an addition, or opening up a renovation down to the studs, we're happy to walk your plans or your job site and talk through what a correctly detailed window installation looks like for your specific build. Reach out for a free, no-pressure estimate — we'll give you honest answers about products, process, and cost before anything is ordered.