 Birch Bay Window
 Siding Installation Built for Custer's Exposure
Custer sits in the flat, open farmland north of Ferndale, close enough to the Salish Sea that salt-laden air is a routine part of the weather here even without a waterfront lot. Add in wind-driven rain that comes at exterior walls sideways more often than straight down, and a moss and mildew season that runs across most of the calendar because temperatures stay mild and moisture rarely lets up, and you've got a climate that's genuinely harder on siding than most manufacturer literature accounts for. A siding job that looks fine on install day can start showing problems within a few years if the material, the flashing, or the fastening wasn't right for this exposure.
We install James Hardie fiber cement siding exclusively, and on a project like this, the installation matters as much as the product. Hardie board performs the way it's supposed to when it's installed to the manufacturer's specification — correct clearances, correct fastening, correct flashing and water management behind every seam. Skip any of that and you can undercut even the best siding material on the market. This page walks through what a correct siding installation looks like for a Custer home and how we approach the job from first look to final walkthrough.
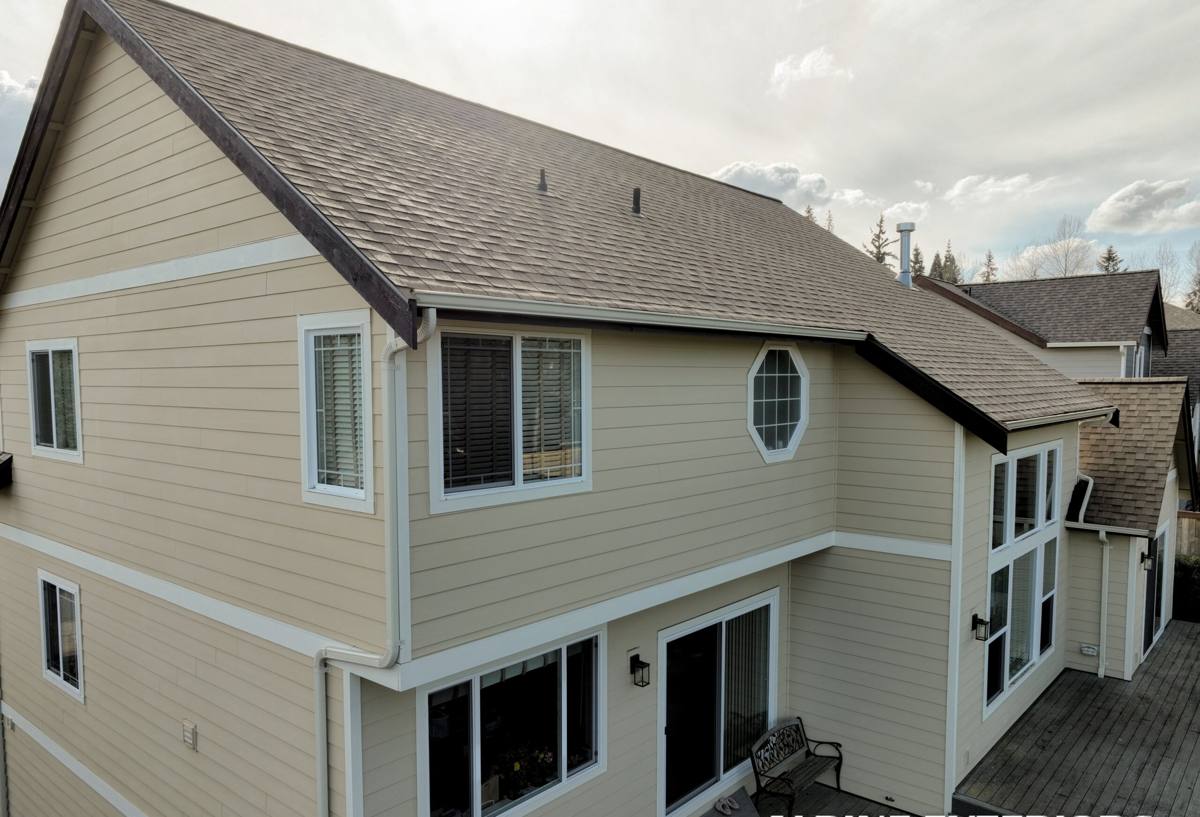
What Custer's Climate Demands From a Siding System
Salt-Laden Air
Salt carried inland on winter storms accelerates the breakdown of lower-grade finishes and speeds corrosion on fasteners, trim hardware, and any metal flashing component. It's a slow process, not an obvious failure, which is exactly why it gets overlooked until a homeowner is a decade in and wondering why the siding looks tired years earlier than expected.
Wind-Driven Rain
Open, flat terrain around Custer doesn't offer much of a wind break, so storms push rain into wall assemblies at an angle instead of dropping it straight down. That's a much tougher test for lap joints, trim intersections, and any seam that relies on caulk alone rather than proper flashing and lap detail underneath.
A Long Moss and Mildew Season
Mild, damp conditions through fall, winter, and spring create an extended growth window for moss and mildew across Whatcom County. Shaded elevations, north-facing walls, and anywhere water sits instead of draining show it first. Siding material and finish both play a role in how much of that growth actually takes hold and how easily it comes off.
Freeze-Thaw and Moisture Cycling
Whatcom County doesn't see extreme cold, but it does see repeated cycles of saturation and drying, along with the occasional hard freeze on wet material. Siding that absorbs and holds moisture is under more stress here than the same product would be in a drier inland climate, even without a true deep freeze.
Why James Hardie Fiber Cement Fits This Exposure
Fiber cement is manufactured from cement, sand, and cellulose fibers, and it doesn't rot, doesn't support insect activity the way wood-based products can, and is non-combustible. James Hardie's HZ5 product line is engineered specifically for wetter, harsher climates — a real consideration in a region that sees the combination of salt air, driving rain, and near-constant moisture that Custer does. The factory-applied ColorPlus finish is baked on under controlled conditions rather than applied on site, which gives it more consistent adhesion and a longer service life against fading and moss staining than field-applied paint typically achieves.
None of that means fiber cement is maintenance-free or forgiving of a bad install. It still needs correct clearances above grade, decks, and roof lines, correct fastening patterns, and properly lapped and sealed flashing everywhere the siding meets a window, door, corner, or roof plane. A quality product installed poorly will still leak, still trap moisture, and still fail early. That's the part of the job that actually determines whether a siding installation holds up for one winter or several decades.
What a Correct Siding Installation Actually Involves
Assessing What's Behind the Existing Siding
Before any new siding goes up, we look at what's underneath the current material — sheathing condition, any signs of past moisture intrusion, and whether the existing weather-resistive barrier is still doing its job or needs to be replaced. Installing new siding over a compromised substrate just locks a problem behind a new wall, and it's a mistake that's expensive to find later.
Weather-Resistive Barrier and Flashing
A house wrap or equivalent weather-resistive barrier goes on correctly lapped, and flashing gets integrated at every window, door, deck ledger, and roof-to-wall transition before a single piece of siding is hung. This is the step that determines whether wind-driven rain stays out of the wall assembly, and it's also the step that's easiest for a rushed crew to shortcut because it doesn't show once the siding is up.
Clearances and Fastening
James Hardie specifies minimum clearances between siding and grade, decks, patios, and roof surfaces, along with specific fastener types, spacing, and penetration depth. Getting these wrong is one of the most common causes of premature siding failure — not a defect in the board itself, but moisture wicking up from a clearance gap that's too tight, or fasteners that split boards or back out over time.
Trim, Joints, and Caulking
Butt joints, corners, and trim intersections need to be detailed so water sheds away from the wall rather than sitting in a seam. Caulk has a role here, but it's a backup to correct lap and flashing detail, not the primary defense. A siding job that leans on caulk to do the work flashing should be doing is a job that will need attention sooner than it should.
Final Inspection and Cleanup
We walk the finished job checking fastener lines, joint detailing, and trim before calling it done, and we handle site cleanup as part of the job rather than an afterthought.
Signs a Custer Home May Need Siding Attention
- Visible cracking, buckling, or warping in the siding panels or lap boards
- Soft spots, discoloration, or a spongy feel when pressing on the siding near the base of the wall
- Moss or mildew that keeps returning to the same spots shortly after cleaning
- Paint or finish that's peeling, bubbling, or chalking well ahead of its expected service life
- Gaps opening up at trim, corners, or window and door surrounds
- Rising utility bills that point to a wall assembly no longer performing the way it should
Cost Factors on a Custer Siding Installation
| Factor | Why It Matters |
|---|---|
| Existing wall condition | Sheathing repair or replacement, if needed, is priced separately from siding installation itself |
| Home size and wall complexity | More corners, dormers, and trim intersections mean more detail work per square foot |
| Siding profile and accessories | Lap width, trim style, and corner treatment affect both material cost and labor time |
| Access and site conditions | Multi-story walls, tight lot lines, or landscaping obstacles can affect scaffolding and staging needs |
| Tear-off scope | Full removal of existing siding down to the sheathing versus a more limited scope changes both cost and timeline |
Our Process, Start to Finish
We start with an on-site assessment of the existing siding and wall assembly, looking at substrate condition, flashing detail at penetrations, and any active moisture issues before we talk about product or price. From there we put together a written scope that spells out tear-off, substrate repair if needed, weather-resistive barrier and flashing work, and the Hardie product and profile we're recommending, so there's no ambiguity about what's included before work begins.
During installation, flashing and water management detailing gets handled as standard practice at every window, door, and transition — not offered as an upgrade. We follow James Hardie's published fastening and clearance specifications on every job, because that's what keeps the manufacturer's warranty intact and what actually determines how the siding performs through a Whatcom County winter. We walk the finished job with you before we consider it done.
What to Check Before Hiring a Siding Contractor in Custer
- Confirm current Washington contractor licensing and active liability insurance
- Ask for a written scope that separates tear-off, substrate repair, and installation labor from material cost
- Ask specifically how they handle flashing and weather-resistive barrier integration, not just the finished appearance
- Get clarity on which fastening and clearance specifications they follow and why
- Ask whether the manufacturer's product warranty stays intact under their installation practices
Why a Crew That Already Works Custer Matters
A contractor who works this stretch of Whatcom County regularly already knows how salt air, wind-driven rain, and a long moss season behave here compared to a drier, more sheltered inland market. That shows up in decisions that don't get noticed until years later — how much lap a flashing detail gets, whether a clearance gets held to spec even when it's inconvenient, which fastener actually goes in versus what's in the truck. Those decisions are what separate a siding installation that holds up for decades from one that needs attention again in five years.
If you're weighing a full siding replacement or want a second opinion on a quote you've already gotten for a Custer property, we're happy to take a look and give you a straight answer. Reach out below for a free, no-pressure estimate.