 Birch Bay Window
 Siding Installation in Nooksack: Built for What This Climate Actually Does to a House
Homes around Nooksack sit close enough to the Salish Sea that salt-laden air is a daily fact of life, and far enough into Whatcom County's rain belt that "driving rain" isn't a figure of speech — it's wind-blown moisture that finds every gap, seam, and fastener hole a siding system leaves open. Add a moss and algae season that can run most of the year in shaded, north-facing exposures, and you have a climate that is genuinely hard on exterior cladding. Siding installation here isn't a cosmetic upgrade. It's the single biggest factor in whether a house stays dry, holds its finish, and avoids rot damage for the next several decades.
This page is about one service in one area: installing new siding correctly on a Nooksack-area home, using a product built for this climate, put on by a crew that treats moisture management as the actual job — not paint color.
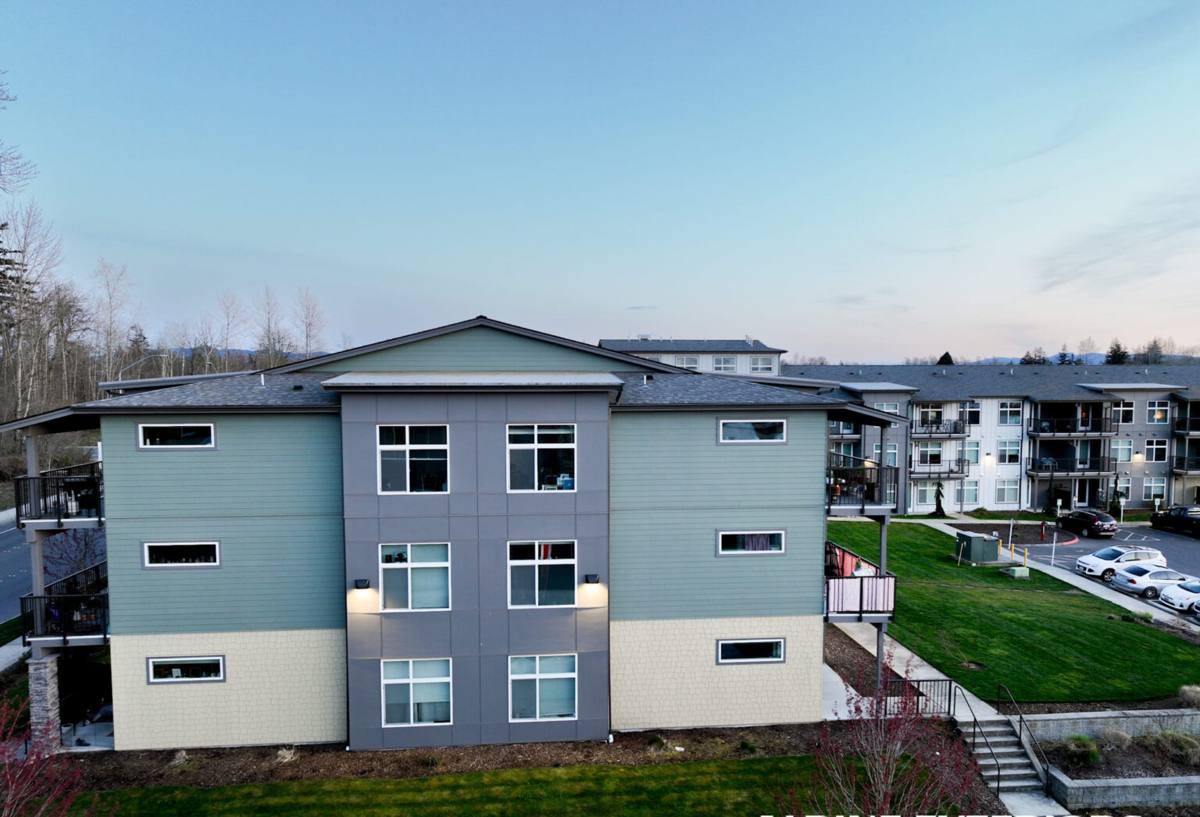
What Local Homes Are Up Against
Salt Air and Corrosion
Proximity to Birch Bay and the broader coastline means airborne salt settles on every exterior surface, including fasteners, flashing, and trim. Over time, salt exposure accelerates corrosion in lower-grade fasteners and can degrade paint films that aren't formulated to resist it. Siding installed here needs corrosion-resistant fastening and a factory finish that's actually rated for coastal exposure — not just "exterior grade."
Driving Rain
Whatcom County's weather pattern regularly pushes rain sideways, not just down. That matters enormously for installation detail: laps, flashing at windows and penetrations, and the water-resistive barrier behind the siding all have to be sequenced correctly, because wind-driven rain will exploit any shortcut in that sequence. A siding product can be excellent and still fail if it's installed as though the rain only falls straight down.
The Long Moss Season
Shaded roof lines, tree cover, and the region's damp shoulder seasons keep moss, algae, and mildew active on north- and east-facing walls for much of the year. Siding material and finish quality determine how much of that growth actually takes hold versus rinses off. Porous or absorbent surfaces stay damp longer and give organic growth something to root into.
Why We Install Only James Hardie Fiber Cement
We made a deliberate decision not to install vinyl siding, LP SmartSide, Cemplank, Allura, primed spruce, or cedar. Each of those products has real strengths — cedar's appearance, vinyl's low upfront cost, engineered wood's workability. But every one of them asks a homeowner in this specific climate to accept a trade-off we're not willing to install and then stand behind: vinyl can warp and doesn't stop moisture intrusion at the cladding layer, engineered wood products are wood-based and depend heavily on perfect field sealing of cut edges to resist moisture, and untreated wood siding needs a maintenance commitment most homeowners underestimate in a climate this wet.
James Hardie fiber cement is non-combustible, dimensionally stable in wet-dry cycling, and available in HZ5 formulations engineered for freeze-thaw and moisture-cycling climates like ours. The factory-applied ColorPlus finish is baked on under controlled conditions rather than field-painted, which gives it far better adhesion and UV/moisture resistance than site-applied paint — a real advantage in a region that doesn't give paint much drying time between rain events. It's backed by a strong transferable warranty, which matters if the home ever sells. We don't install alternatives because we're only willing to warranty and stand behind work we believe will actually perform here.
Why "Installed to Spec" Matters as Much as the Product
Even the best fiber cement product fails prematurely if it's installed wrong. Hardie publishes detailed installation requirements — clearances, fastening patterns, flashing details, joint treatment — specifically because the product's long-term performance depends on the installer following them, not improvising. A crew that treats those specs as optional is the most common reason a "Hardie job" underperforms.
What a Correct Siding Installation Actually Involves
- Removal of existing siding and a full inspection of the sheathing underneath for hidden rot or moisture damage before anything new goes up
- Repair or replacement of any compromised sheathing — covering over damaged sheathing is the single most common shortcut that causes callbacks
- A continuous, correctly lapped water-resistive barrier, installed so every seam sheds water downward and outward
- Proper flashing at every window, door, and penetration, integrated with the barrier rather than caulked on afterward as a patch
- Manufacturer-specified clearances at the foundation, roofline, and any hard surfaces, so the bottom edge of the siding never sits in standing water or trapped moisture
- Corrosion-resistant fasteners driven at the correct depth and pattern — over-driven or under-driven fasteners are a leading cause of cracking and loosening in coastal climates
- Joint and seam treatment following Hardie's specification, not general caulking practice
Our Installation Process
1. Assessment and Measurement
We walk the exterior, document existing conditions, and measure for material takeoff. This is also when we look for signs of existing moisture problems — the kind of thing that needs to be dealt with before new siding goes on, not hidden behind it.
2. Tear-Off and Sheathing Inspection
Old siding comes off and the sheathing gets inspected directly. Any soft, delaminated, or water-damaged sheathing is flagged and addressed before installation continues — this is non-negotiable, because it's the step that determines whether the house is actually dry underneath the new cladding.
3. Weather Barrier and Flashing
A continuous water-resistive barrier goes on with correct lapping, and flashing is integrated at every window, door, and penetration. This step is what actually keeps driving rain out — the siding itself is the second line of defense, not the first.
4. Hardie Panel or Plank Installation
Siding is installed to Hardie's published clearances and fastening specification, with attention to consistent reveal lines and properly treated joints.
5. Trim, Detailing, and Final Inspection
Trim work is completed, touch-up is done using Hardie-compatible materials, and we do a final walk-through before calling the job finished.
Correct Installation vs. Common Shortcuts
| Detail | Correct Approach | Common Shortcut That Causes Problems |
|---|---|---|
| Sheathing | Inspected and repaired before new siding goes on | New siding installed directly over damaged sheathing |
| Flashing | Integrated with the water-resistive barrier at every opening | Gaps caulked over after the fact instead of flashed properly |
| Clearances | Set to manufacturer spec at grade, roofline, and decks | Siding installed tight to grade or hardscape, trapping moisture |
| Fasteners | Corrosion-resistant, driven to correct depth and spacing | Standard fasteners over-driven, cracking the board over time |
| Joints | Treated per manufacturer specification | General-purpose caulk used as a catch-all seal |
Cost Factors for a Nooksack-Area Siding Installation
Every home is different, so we don't publish flat pricing — but the factors that actually move the number are consistent:
| Factor | Why It Affects Cost |
|---|---|
| Condition of existing sheathing | Hidden moisture damage found during tear-off adds repair scope before new siding can go on |
| Home size and wall complexity | More corners, dormers, and penetrations mean more flashing and cutting labor |
| Siding profile chosen | Lap, panel, and shingle-style Hardie products differ in material and labor time |
| Trim and accessory scope | Full trim replacement adds cost but keeps the finished look and detailing consistent |
| Access and site conditions | Slopes, tree cover, and tight lot lines around Whatcom County homes can affect staging and labor time |
After Installation: What Keeps Fiber Cement Siding Performing
- Rinse siding periodically, especially shaded north- and east-facing walls where moss and algae take hold fastest
- Keep gutters clear so overflow doesn't run down the siding face or pool at the base
- Trim back vegetation and tree cover that keeps siding damp and shaded longer than necessary
- Inspect caulked joints annually and have any cracked or failed sealant addressed promptly
- Watch for any staining or discoloration near ground contact, which can signal a clearance or drainage issue worth checking
Why Hiring a Crew That Already Works in Nooksack Matters
Manufacturer installation manuals are written for a generic climate. Knowing how to apply them in a place with salt air, sideways rain, and a nine-month moss season is a different skill — one that only comes from actually installing siding on homes in this part of Whatcom County. A crew that already works this area knows which wall exposures need extra attention, how local weather patterns affect sequencing and cure times, and what "correct clearance" actually looks like on the kinds of lots and grading common around here. That local familiarity is as much a part of the finished job's durability as the siding product itself.
If you're planning a siding replacement or new installation for a home in the Nooksack area, we're happy to walk the property, look at what your walls are actually dealing with, and put together a straightforward, no-pressure estimate using the form below.